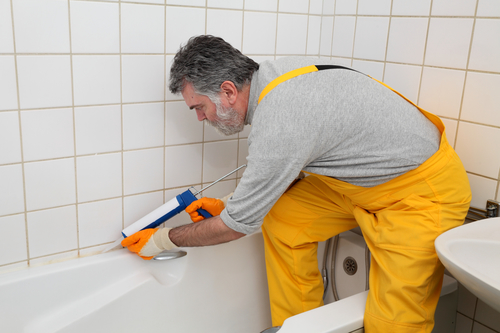
To replace bathtub caulk properly, remove the failing sealant, clean and dry the joint, choose a bathroom-rated product compatible with the tub and wall, then apply a smooth new bead and let it cure for the time on the label. Squeezing fresh silicone over old peeling caulk may look better for a day, but it rarely fixes the weak bond underneath.
The telltale signs are familiar: a dark line where the tub meets tile, a little flap of silicone that catches the cleaning cloth, or water collecting in a corner after every shower. The job looks small, yet the seam protects a part of the bathroom that is hard to inspect once water gets behind the finish.
Here is a careful DIY method, including when a new bead is enough, which products to compare, how to avoid a messy edge, and when the problem may be bigger than the caulk.
Know when the caulk needs replacing
A sound bathtub joint should have a continuous, flexible seal that stays attached to both surfaces. If you see cracks, gaps, lifting edges or sections that feel loose, the seal may no longer keep water out. Staining alone is not always proof of failure, but dark discoloration that persists after cleaning deserves closer inspection.
Check the entire perimeter, especially the corners and the place where the tub meets the wall. A tiny gap near the shower spray can admit more water than a larger dry gap at the far end. Also inspect around the tub spout and any trim where water could run behind the wall.
If tiles move, grout crumbles, the wall feels soft or a ceiling below shows water damage, do not assume new caulk will solve it. Those signs can indicate a leak or damaged backing that needs a professional assessment before sealing.
Choose a bathroom sealant that suits the surfaces
Many tub-to-tile joints use a bathroom-rated 100 percent silicone sealant because it stays flexible and resists water. But material compatibility matters. Some acrylic tubs, specialty surrounds, stone surfaces and refinished finishes have specific sealant recommendations.
Read the tub or surround manufacturer’s care instructions first. Then check the caulk label for the listed substrates, cure conditions and cleanup method. Paintable acrylic latex products may be useful for certain trim joints, but they are not automatically suitable for a wet tub-to-wall seam.
The DAP Silicone Max Kitchen & Bath guidance describes preparation, masking and tooling for one bathroom silicone product. Use the instructions for the exact tube you buy; products with similar names can have different cure times.
Gather the right tools before opening the tube
For a typical small repair, prepare a plastic caulk removal tool, a utility knife used carefully where appropriate, a non-scratching scraper, cleaning cloths, mild cleaner, painter’s tape, a caulk gun if using a cartridge, and a suitable finishing tool. Gloves help keep old sealant and cleaning residue off your hands.
Protect the tub surface with a towel or drop cloth. Hard metal scrapers can scratch acrylic and some finishes, so start with plastic and test in a hidden spot. Keep blades away from the joint’s waterproofing membrane and avoid cutting deeply into wall corners.
Plan enough downtime for cleaning, drying and curing. A bathroom used by several people may need a different schedule from a guest tub. Rushing the job because someone needs a shower that evening is a common reason the fresh seal fails.
Remove the old caulk completely
Start by cutting along the edges of the old bead without digging into the tub or tile. Lift a loose end and pull gently. Some silicone peels away in long strips; other sections break into small pieces. Work slowly rather than scraping aggressively across the finish.
Remove the remaining residue with a surface-safe tool or a caulk remover specifically labeled for the old sealant type. A remover made for latex caulk may not work on silicone. Always follow the product instructions and keep the area ventilated.
Do not try to hide old residue under a thicker bead. New silicone needs contact with the prepared surfaces on both sides of the joint. If the edges remain greasy, dusty or covered with cured fragments, adhesion can suffer.
Clean the joint without damaging the finish
Wash away soap scum, body oils and debris with a cleaner approved for the tub and tile. Rinse thoroughly. A surface that looks clean can still carry residue from bath products, so pay special attention to the bottom edge where water pools.
If you use a mildew-cleaning product, follow its label and never mix cleaners. In particular, do not combine bleach with ammonia or acidic cleaners. Keep the bathroom ventilated and protect your skin and eyes as directed.
For persistent black staining beneath loose sealant, remove the affected material and inspect the substrate. If the wall behind it is wet, soft or moldy over a significant area, stop and investigate. A new bead should not trap an unresolved moisture problem.
Drying is the step most people underestimate
After cleaning, allow the joint to dry completely. Water caught between the tub and surround can weaken adhesion or become trapped behind the new bead. Use clean cloths to remove visible moisture and allow additional air-drying time based on the room conditions.
A fan can help circulate air, but do not blow dust directly into the seam. Avoid running the shower or splashing the area while it dries. If the joint keeps getting wet from a hidden source, caulking over it is not a durable repair.
When you replace bathtub caulk, patience during preparation often matters more than how quickly you can squeeze the tube. A neat bead on a damp surface is still a poor seal.
Should you fill the bathtub with water first?
Some tub manufacturers and installers recommend filling certain tubs with water during caulking to account for movement under load. Others specify a different method. The correct choice depends on the tub material, support and manufacturer’s installation instructions.
Do not assume this step applies to every bathtub. If the tub visibly flexes when someone steps in, investigate whether it is adequately supported. Caulk cannot compensate for significant movement caused by an unstable installation.
When instructions do call for filling the tub, follow their guidance on water level and when to drain it after curing. Do not improvise a method that conflicts with the sealant’s cure requirements.
Use painter’s tape for a controlled edge
Apply two strips of suitable painter’s tape, one along the tub and one along the wall, leaving a narrow, even gap for the bead. The width should cover the actual joint without creating an unnecessarily wide stripe of silicone.
At corners, overlap tape carefully so the finished line does not jump or narrow. Press down the tape edges gently. Avoid taping over damp or dusty surfaces because the tape can lift and leave an irregular edge.
Practice a short section if you have never used a caulk gun. A steady hand and a small opening in the nozzle usually produce a cleaner bead than cutting the tip very wide and trying to smooth away excess material later.
Apply the bead without gaps or stop-start ridges
Cut the nozzle according to the joint size and pierce the cartridge seal if required. Hold the gun at a comfortable angle and move at a steady pace while applying gentle pressure. Aim for enough sealant to bridge both surfaces without creating a large mound.
Work in manageable sections. At an inside corner, make sure the bead remains continuous and contacts both sides. If you pause, overlap slightly and smooth the join before the sealant begins to skin over.
Do not spread silicone so thin that the middle of the joint becomes almost transparent. A good bead has enough body to remain flexible while still looking tidy. If the gap is unusually wide or deep, ask about the correct backer material rather than filling a large void entirely with caulk.
Tool the seal and remove tape promptly
Smooth the fresh bead with a suitable finishing tool, using light pressure. The goal is a continuous, gently concave surface that sheds water and stays bonded at the edges. Excessive pressure can pull sealant out of the joint and leave a weak center.
Remove the painter’s tape while the bead is still workable, following the product’s skin-time guidance. Pull the tape away at an angle so it does not drag fresh sealant across the tub. Touch up only where needed; repeated smoothing can make a clean line worse.
GE Sealants’ bathtub caulking guide emphasizes surface preparation and allowing the sealant to cure. The exact timing depends on the product, bead size, temperature and humidity, so do not substitute a generic online time for the tube’s instructions.
Let the new seal cure before using the shower
Some bathroom silicones advertise short water-ready times under specified conditions, while full cure can take considerably longer. Check the label and technical sheet. A cold bathroom, thick bead or unusually dry air can change curing behavior.
Keep the joint free from water, cleaning products and unnecessary touching for the stated period. Do not test it by spraying the seam a few minutes after finishing unless the product specifically permits that exposure.
When you replace bathtub caulk, the first shower should happen only after the required water-exposure wait. Otherwise, water can reach the interface before the seal has developed adequate strength.
Why fresh caulk sometimes peels within weeks
The most common culprits are leftover old silicone, soap residue, moisture, an incompatible product, excessive tub movement or a joint too wide for the chosen bead. A rough surface may hide gaps that were not fully cleaned.
Another issue is applying new silicone over a bead that is still firmly attached but stained. The fresh material may adhere poorly to cured sealant and eventually separate. Removing the old bead is more work, but it gives the new product a better chance.
If the same corner fails repeatedly, look for a cause beyond technique. Movement, a leak behind the surround or a damaged grout line can keep stressing the seal. A second or third cosmetic repair will not address those conditions.
Prevent the dark line from returning
After the seal has cured, reduce standing water by wiping the tub ledge after use. Clean with products approved for the sealant and surrounding finishes. Abrasive scrubbing can damage both the bead and delicate tub surfaces.
Run the bathroom exhaust fan during showers and for an appropriate period afterward. If the room stays humid or mirrors remain fogged for a long time, check the fan’s performance and whether it vents outdoors. Our guide to bathroom exhaust fan venting explains why damp air needs a proper exit path.
Inspect the corners occasionally. Catching a small lifted edge early is much easier than discovering water damage after months of leakage.
When to call a professional
Call for help if the tub moves noticeably, the surround is loose, there is a persistent leak below, or the wall feels soft. A plumber, tile professional or qualified remodeler may need to check the installation before anyone seals the joint again.
For a stable tub with a sound surround, replacing the caulk is a manageable DIY job when you have the right materials and enough drying time. The key is not a fancy tool; it is a clean surface, compatible sealant and careful cure.
Can I put new silicone over old bathtub caulk?
It is usually better to remove the failing bead and residue first. New sealant needs clean contact with the tub and wall for reliable adhesion.
How long after caulking can I shower?
Follow the exact product’s water-ready and cure instructions. Times vary with sealant type, bead size, temperature and humidity.
What if the gap between tub and tile is very wide?
Check the sealant’s permitted joint dimensions and whether approved backer material is needed. A wide moving gap may also indicate a support issue.
