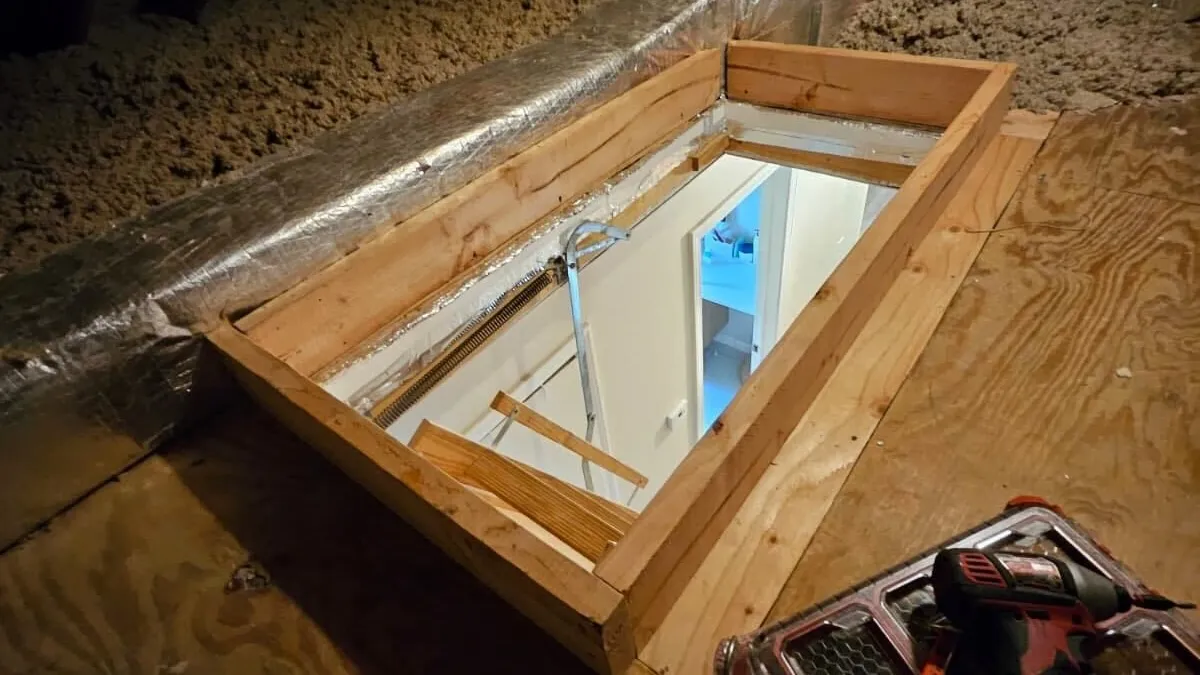
The hallway feels chilly even though the thermostat is satisfied. You look up and notice the small ceiling panel that leads to the attic. It seems harmless, but a loose hatch can behave like an open window between conditioned rooms and an unconditioned attic. Attic hatch insulation works best when it does two jobs together: slowing heat flow through the panel and stopping air from slipping around its edges.
This is a relatively focused home improvement, yet the details matter. A thick piece of foam does little if the panel rattles in its frame. A neat weatherstrip may stop drafts but leave a cold, uninsulated lid. The right solution depends on whether you have a simple lift-out panel, a hinged door, or pull-down attic stairs.
Find out whether the hatch is the weak spot
Stand beneath the access panel on a cold or windy day. Look for a visible gap, loose trim, dark dust streaks around the frame, or a panel that no longer sits flat. A tissue moving near the seam may suggest air movement, although pressure conditions and indoor fans can change what you see.
Compare the ceiling temperature near the hatch with the surrounding ceiling using an appropriate thermometer if you have one. A cool patch is a clue, not a complete energy audit. If several rooms are uncomfortable, duct leakage, missing insulation, or other ceiling penetrations may matter more.
Our article on basement rim joist insulation covers another common leakage area at the opposite end of the house. A home often needs several small air-sealing fixes rather than one dramatic upgrade.
Understand the two layers of the fix
Weatherstripping seals the perimeter where the hatch meets its frame. Insulation adds resistance to heat transfer through the panel itself. You need both if the access opening is otherwise unprotected.
The ENERGY STAR attic-hatch guide describes using self-adhesive weatherstripping and attaching rigid foam or fiberglass insulation to the back of a hatch. It also notes that pull-down stairs can use purpose-made insulated covers.
Think of the panel as a small exterior door. It should close snugly, resist heat flow, and still open without damaging the insulation. A permanent seal that blocks access to wiring, mechanical equipment, or inspections is not a practical repair.
Measure the opening before buying materials
Measure the panel’s length, width, thickness, and how it rests on the frame. Record whether it lifts straight up, swings on hinges, or folds with a stair unit. Check how much clearance exists above it for added insulation.
Also inspect the frame. Some older openings rely on a narrow molding ledge that does not offer much room for a gasket. Others have uneven trim or paint buildup that keeps the panel from sitting level. Correcting the support may matter more than choosing an expensive foam board.
Bring those measurements to the store. Buying a generic “attic seal kit” without checking clearances can leave you with a lid that cannot close or insulation that scrapes against nearby framing.
Choose weatherstripping that compresses without fighting the latch
A gasket should form a continuous seal around the opening, including corners. If it is too thin, gaps remain. If it is too thick or stiff, the panel may sit proud of the ceiling and leave a different opening. Test a short piece before applying the entire perimeter.
Clean and dry the contact surface, remove loose paint, and follow the product’s adhesive instructions. At corners, fit the material neatly rather than stretching it until it pulls away. A loose hatch may need simple mechanical latches to keep the gasket compressed.
The U.S. Department of Energy’s Building Science Education guidance recommends a gasket and a closure that pulls the access panel firmly against it. This is why a foam strip alone cannot rescue a lid that barely touches the frame.
Pick insulation that suits the type of access
Rigid foam board can be cut to fit the back of a lift-out hatch and is often easier to keep neat than loose batts. Fiberglass can also work when secured so it stays in place and does not fall into the hall each time the panel opens. Follow product and local fire-safety requirements, especially where foam must be protected or cannot be left exposed.
For pull-down stairs, a box-like insulated cover over the stair opening is often more practical than attaching a thick layer directly to moving sections. The cover needs enough height for the folded stairs and hardware, plus a gasket where it meets the attic floor.
Do not use a material that blocks the stairs, pinches electrical cables, or makes the hatch too heavy to handle safely. Good attic hatch insulation should improve comfort without turning routine attic access into a wrestling match.
Pay attention to the insulation around the opening
A well-insulated lid can still sit inside a poorly insulated ring of ceiling. Look for gaps where loose-fill insulation has been pushed away from the hatch or fallen into the opening. A small retaining curb can keep insulation from spilling while preserving a usable access path.
Do not pile insulation across soffit ventilation paths or over fixtures that require clearance. Some recessed lights, flues, and other heat-producing components have special spacing rules. If the attic contains unusual wiring, vermiculite, or damaged insulation, pause and ask a qualified professional to evaluate it.
When attic insulation is uneven, improving the hatch may be only one step. A larger project should consider air sealing, ventilation, and the roof assembly together, not simply add more material everywhere.
What to do with a warped or painted-shut panel
If the panel bows in the middle, a thicker gasket may not create an even seal. The lid may need to be straightened or replaced with a suitable rigid panel. A painted-shut hatch is another problem: forcing it open can break trim and leave an irregular edge that is harder to seal afterward.
Check hinges, catches, and support ledges before buying insulation. If the opening has no safe support, the repair should include one. A hatch that can fall when opened is a hazard regardless of its energy performance.
Finish the visible trim cleanly, but do not let appearance hide a gap. A tidy painted border should be the last step, after the lid closes properly and the seal is continuous.
A practical weekend sequence for a simple lift-out hatch
Start by clearing the hallway, protecting the floor, and arranging a stable access method. Measure and photograph the panel. Inspect the surrounding framing from a safe position, then choose a gasket that fits the contact surface and insulation that can be secured to the lid.
Clean the frame, apply the weatherstrip according to the manufacturer, and test the hatch’s closure. Add insulation to the attic side without covering handles or latches. Close the panel several times to make sure nothing binds, bows, or falls away.
Finally, check for visible gaps around the full perimeter. The job is not complete if one corner still lifts or the hatch can no longer be opened by the person who normally uses it.
When a pull-down stair cover makes more sense
Pull-down stairs have several moving joints, a broad opening, and a hatch panel that may be thin. Trying to tape every joint can interfere with operation. An insulated enclosure on the attic side can create a more continuous boundary around the entire stair unit.
Measure the folded stair height and the space needed for hardware to move. The cover must open or lift out easily and should not trap anyone in the attic. Check the product’s instructions for fastening, sealing, and required clearances.
If the stair frame is loose, cracked, or improperly installed, fix that structural issue first. Insulation is not a substitute for a secure ladder and properly supported opening.
What this fix can and cannot solve
Sealing the hatch may reduce a localized draft and improve comfort near the opening. It may also help keep humid indoor air from entering a cold attic. But it will not correct a blocked HVAC register, leaky ducts, or large gaps elsewhere in the ceiling.
In snowy climates, attic heat loss can contribute to uneven roof temperatures, but attic hatch insulation alone is not an ice-dam cure. Our ice dam prevention guide explains why the whole ceiling air barrier, insulation, and roof conditions matter.
If you notice frost, damp sheathing, or a persistent musty smell in the attic, investigate the moisture source before sealing everything up. A ventilation or roof leak problem may need professional attention.
Budget decisions that are worth making carefully
For a small lift-out panel, materials may be modest, but exact cost varies by product, access, and location. Spending more on a thick insulation board while ignoring the perimeter seal is usually a poor allocation of effort. A correctly fitted gasket and an appropriate insulated lid work as a pair.
For pull-down stairs, compare a ready-made insulated tent or box with a carefully constructed cover. Factor in ease of use, durability, and whether the enclosure stays closed after repeated attic visits. The cheapest option is not a bargain if it must be rebuilt each winter.
Ask for an energy audit when drafts persist after sensible repairs. A professional can identify whether the hatch is a major leakage point or just the most visible symptom.
Final thoughts: make the access panel disappear into the ceiling again
Successful attic hatch insulation is not flashy. The panel sits flush, the seal closes evenly, the attic remains accessible, and the hallway no longer feels as though it has a hidden window overhead.
Measure first, fix the closure, add suitable insulation, and check the surrounding attic conditions. That order makes a small home improvement feel finished rather than improvised.
