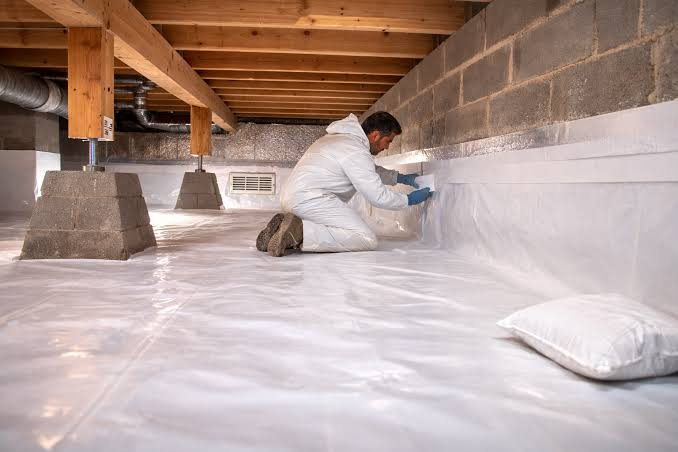
You open the crawl space hatch and smell damp earth. The floor above feels chilly, and the insulation looks tired. It is tempting to buy a roll of plastic and cover the soil. A crawl space vapor barrier can help, but it cannot fix a broken pipe or rainwater flowing through a foundation wall. The useful first question is where the moisture comes from and how it reaches the wood above.
Find the water before covering the ground
Look from a safe access point for puddles, darkened framing, sagging insulation, or water marks on the wall. Do not enter a crawl space with standing water near electrical equipment, sewage, or unstable ground. If dampness follows heavy rain, check outdoor drainage first. If the soil remains moist through dry weather, ground vapor may be a steady source. A crawl space vapor barrier addresses one part of that problem, not every source.
Walk around the house after a storm. Do downspouts empty beside the foundation? Does the ground slope toward the wall? Is a sprinkler wetting the same corner every day? Those conditions can deliver liquid water under the house even after a membrane is installed. Correcting the exterior path may be more important than adding a thicker sheet inside.
What the plastic actually does
Moisture can evaporate from bare soil into the crawl space air. A continuous polyethylene ground cover helps limit that movement. It also helps separate soil gases from the space. Loose sheets with large uncovered edges will not perform like a properly sealed barrier. The U.S. Department of Energy’s Building Science Education guidance
A contractor should prepare the ground, remove sharp debris, and detail every pipe and support column. A small gap around each pier can leave a surprising amount of soil exposed. The crawl space vapor barrier should form a continuous layer rather than a patchwork held down by bricks. Ask which tape or sealant is compatible with the chosen membrane and how the edges will be secured.
Drainage and condensation are separate jobs
The EPA’s moisture-control guidance
Some crawl spaces are vented; others are sealed or conditioned. Their humidity-control strategies differ, even though a ground cover is useful in both. Closing vents without checking combustion equipment, insulation, climate, and code requirements can create new problems. Ask a qualified building professional to explain the existing design before approving encapsulation.
Think about future repairs
The space may contain plumbing shutoffs, electrical connections, ducts, and equipment that will need service later. A membrane should not make those parts inaccessible. Ask where a worker can move safely, how pipes will be sealed, and how future work can be done without destroying the barrier. If access is too tight or unsafe, hire an inspector rather than crawling in to measure it yourself.
The site’s outdoor faucet winterizing guidebathroom fan venting guide
When a musty smell is not a soil problem
A crawl space can smell damp because of a plumbing leak, an old flood, pest-contaminated insulation, or wood that has stayed wet. The crawl space vapor barrier should not become a cover for a problem that needs repair. Ask an inspector to identify active water and damaged materials before laying a membrane. If the wood is soft, visibly decayed, or supporting a load that seems compromised, structural evaluation comes first. Covering the floor will not restore the strength of a damaged joist.
Check whether moisture changes with the seasons. A wet patch that appears after heavy rain suggests a different source from condensation on a cold pipe during humid summer weather. Photograph conditions from a safe access point after storms and during dry weeks. If the crawl space has standing water or electrical hazards, stay out and arrange professional help. These observations let you compare a drainage proposal with a ground-vapor proposal rather than buying the most elaborate package automatically.
Thickness, seams, and wall edges decide the result
A 6-mil polyethylene sheet is a baseline described in federal building guidance, not a promise that every thin sheet will survive years of service. A space used regularly for plumbing and HVAC access may benefit from a tougher material and a protected path for workers. Sharp rocks and leftover construction debris can puncture plastic. A contractor should describe how the ground will be prepared and how tears will be repaired during installation.
The seams deserve a close look. Overlapping sheets without sealing them leaves openings for moisture movement. Tape, sealant, and membrane need to be compatible. Around pipes and support piers, the plastic should be carefully fitted rather than cut into a large loose opening. At the walls, the ground cover should extend upward and be secured in a way that fits the chosen crawl space design. Ask to see photographs of those details before the installer closes the access hatch.
Think about what happens during the next plumbing repair. If the only route to a shutoff requires dragging tools across unprotected plastic, punctures are likely. Ask for a service path or a repair plan. The membrane is part of the house’s working infrastructure, not a disposable liner. A neat central sheet with torn corners and loose edges is less useful than a carefully detailed system that can be inspected later.
Encapsulation is a bigger decision than plastic
Contractors may use the word encapsulation to describe a sealed crawl space with ground membrane, wall insulation, air sealing, and humidity control. Those components can work together, but the appropriate design depends on climate, existing vents, mechanical equipment, and local code. A ground cover is not the same thing as a fully conditioned crawl space. Ask exactly what is included in a proposal and what maintenance it will require.
If a contractor recommends closing foundation vents, ask how humidity will be managed afterward. Some designs use conditioned air; others use dedicated dehumidification. Each choice has energy, drainage, and service implications. Do not close vents casually or seal combustion appliances into a space without qualified evaluation. A crawl space vapor barrier should support the building’s ventilation and moisture strategy rather than conflict with it.
In a coastal or humid region, outside air entering a cool crawl space may contribute to condensation. In a cold region, insulation placement and winter air leakage may matter more. That does not mean a homeowner needs to design the entire assembly. It means a contractor should explain why a particular system fits this house, not just show photographs of another project in a different climate.
Use a simple worked example to compare quotes
Imagine a home with 900 square feet of crawl space and a downspout that dumps water at one foundation corner. One estimate offers a membrane and dehumidifier without mentioning drainage. Another includes an assessment of the downspout, surface grading, ground cover details, and moisture monitoring. The second proposal is easier to evaluate because it identifies the source and sequence of work. A higher price is not automatically better, but a clear scope is worth paying attention to.
Now imagine a house with no puddles, stable framing, and exposed soil across the floor. The crawl space vapor barrier may be a straightforward moisture-control improvement. The key is to prepare the surface, seal seams, and finish edges properly. There may be no reason to replace otherwise dry framing or buy equipment without evidence that it is needed. Matching the work to the actual condition is more useful than a one-size-fits-all package.
Ask each contractor to describe how they would know the project succeeded. Would they check for standing water after rain? Document the membrane edges? Monitor humidity for a period? A proposal that includes a clear verification plan is more informative than one that promises the crawl space will never smell again.
What should appear in the contract
A written scope should state the approximate floor area, membrane type and thickness, seam method, wall and pier details, and how penetrations will be sealed. It should identify whether debris removal, drainage repairs, insulation, pest cleanup, or dehumidification are included. Hidden damage should have a defined approval process before extra charges are incurred. If the contractor is not addressing standing water, that exclusion should be clear.
Ask who will inspect the work and whether photographs will be provided. The finished membrane should not conceal plumbing shutoffs, drains, or equipment that needs service. If a sump or drain is part of the system, ask how it remains accessible and how the homeowner will know if it stops working. Good documentation makes later maintenance easier, especially if the house changes hands.
Keep the improvement useful over time
After installation, look for water after the next heavy rain and check whether any seams or edges have been disturbed by service work. Do not assume a crawl space is permanently dry because the plastic looks clean. If odors return, investigate the source instead of adding fragrance or spraying chemicals. A new plumbing leak can happen in a house with an excellent ground membrane.
If the floor above still feels cold, that may be an insulation or air-sealing issue rather than a failure of the crawl space vapor barrier. Separate comfort complaints from moisture measurements. The right next step might be an energy assessment, not more plastic. Similarly, an elevated humidity reading should be interpreted with outdoor conditions and the selected ventilation strategy.
Final thoughts
A crawl space vapor barrier works best when it has a specific job: reducing moisture that rises from the ground. First deal with liquid water, damaged materials, and unsafe conditions. Then insist on continuous seams, careful edges, and a design that lets future repairs happen. The result should be a space that is easier to maintain and understand, not a hidden area nobody wants to inspect again.
