A cold draft curling across the garage floor often starts at a strip of rubber no one notices until it fails. A worn garage door bottom seal can leave a narrow opening for air, grit, and splash water. Replacing it can be straightforward, but only if the door, retainer, and floor are sound.
The key is to identify the exact seal profile and check whether the gap comes from worn rubber, uneven concrete, or a door that no longer closes evenly. Those problems look similar from across the room and need different fixes.
You can make a useful diagnosis without touching the spring system or taking apart any loaded garage-door hardware.
The Thin Strip That Changes How the Garage Feels
A garage can look shut tight while a cold line of air slides across the floor. If daylight shows beneath the closed door, the flexible strip at the bottom may be flattened, cracked, or missing a section. Sometimes the concrete floor is uneven instead, so buying rubber first is not always the right move.
The garage door bottom seal is a replaceable barrier that meets the threshold as the door closes. It helps limit drafts, windblown dust, splash water, and some pest entry. It cannot make a garage waterproof or turn an unconditioned garage into a heated room.
On a dry day, close the door and inspect the full width from inside. Look for a continuous contact line, not merely a dark strip hanging from the panel. A seal that touches at the ends but floats over a low center spot needs a different plan from one that has split at the corner.
Identify the Door and Retainer Before Shopping
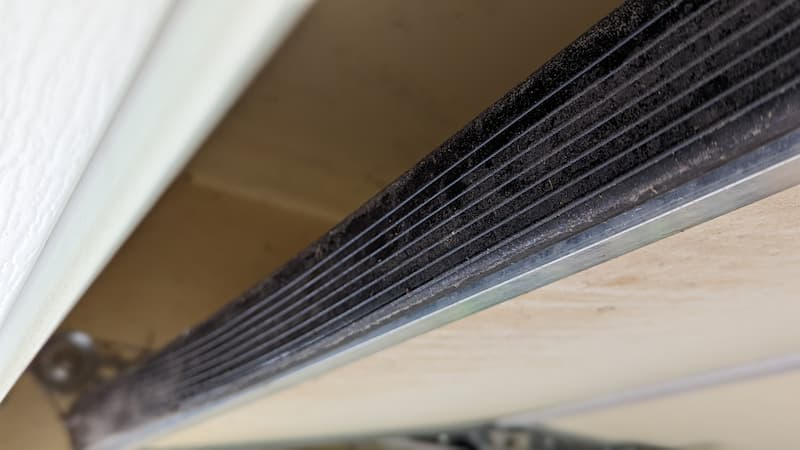
Most sectional doors hold a flexible bottom seal in a metal or plastic retainer. Some use a T-shaped edge that slides into channels; others use a bulb, bead, or different profile. A strip with the wrong edge may look close in the package but refuse to stay in place.
Photograph the end of the retainer and, if safe, a small accessible sample of the old rubber. Measure the door width and the profile’s shape. Do not assume a universal replacement will fit simply because the door is eight or nine feet wide.
Clopay’s replacement-parts guide identifies cracking, wear, and drafts as signs a bottom weather seal may need attention. It also warns that bottom brackets and track problems belong with trained professionals, a distinction worth remembering before removing hardware.
Check Whether the Gap Is Really a Seal Problem
Place a flashlight outside after dark while another adult looks from inside, with the door stationary and no one near moving parts. A narrow, even line of light often points to worn rubber. A large wedge at one corner can indicate door alignment or an uneven slab.
Look at the concrete threshold for chips, a low spot, or a raised patch. A taller seal can bridge a modest unevenness, but a badly sloped floor may need a compatible threshold solution or a professional assessment.
If the door stops short, moves unevenly, or reverses unexpectedly, do not defeat its safety sensors to force a tighter fit. The opener’s travel and force settings are not a substitute for correct mechanical balance and a sound seal.
Keep Hands Away From the Dangerous Hardware
A garage door may weigh hundreds of pounds, and its springs store substantial energy. The bottom brackets can be part of the cable-and-spring system. Removing them to make a seal easier to slide out can cause serious injury.
Never loosen spring hardware, lift cables, or bottom brackets during this job. If the retainer is damaged or the door must be dismantled to reach the seal, stop and book a qualified garage-door technician. A cheap strip is not worth a risky shortcut.
Turn off or unplug the opener before working near the closed door, and follow the door manufacturer’s instructions. Keep children and pets away. Work only on the accessible rubber and retainer areas that the manufacturer specifically allows a homeowner to service.
Measure the Opening With the Door Closed
Measure the actual width at the bottom of the door, not just the garage opening. If you plan to slide a seal into a channel, confirm the retainer’s usable length and whether its ends are crimped or blocked.
Then examine the gap. A modestly uneven floor may benefit from a deeper bulb profile that compresses gently. An overly thick strip can prevent the door from closing normally, so bigger is not automatically better.
Write down the measurements before visiting the hardware store. Bring the profile photo and the door model number if you have it. The best replacement is one that fits the retainer securely and compresses without forcing the door.
Replace the Rubber Without Disturbing the Door
Follow the specific instructions for your door. On a compatible slide-in retainer, the old strip may be pulled from one end after any manufacturer-approved end stop is addressed. Dirt, rust, or bent channel lips can make this harder than it looks.
Clean the accessible channel gently and check for sharp edges. If it is badly crushed, replacing the rubber alone will not solve the problem. Do not pry against loaded brackets or use power tools around spring and cable attachments.
Some profiles slide more easily with a helper feeding the strip straight into the channel. Use only a lubricant the seal maker approves; petroleum products can damage certain rubbers. Trim excess length as directed, leaving the ends fitted to the manufacturer’s specification.
Test the Seal Before Calling the Job Finished
With tools and people clear, restore power and operate the door through a full cycle while standing where you can watch it. The bottom should meet the floor without twisting the seal or making the opener strain.
Check the interior for daylight and feel for a draft on a windy day. Then test the door’s safety-reversal features according to its manual. A new seal changes the contact at the floor, so the door must still close and reverse correctly.
If the opener begins reversing, the door binds, or the rubber bunches into a corner, stop. Do not repeatedly increase closing force. A technician can assess travel settings, alignment, and balance without sacrificing the door’s safety systems.
When a Threshold Strip Helps More Than Taller Rubber
Imagine a garage slab with a shallow dip at the center. The old rubber contacts both corners but leaves a thin opening in the middle. Replacing it with the same profile may improve appearance yet leave the draft unchanged.
A compatible floor threshold can sometimes fill a stable low area, but it must not trap water against the door or interfere with drainage. Test the location after rain and follow the threshold maker’s adhesive and surface-preparation directions.
On a sloped driveway, water may run toward the garage regardless of the door seal. In that case, drainage or concrete work may be the real fix. Do not promise a strip of rubber will stop water that has nowhere else to go.
The Attached-Garage Air Barrier Matters More Than People Think
Sealing the big garage door may make the garage less drafty, but the most important boundary for indoor comfort is often the wall and door between the garage and the living space. That door should close tightly and maintain the required fire separation.
The DOE Building America Solution Center recommends continuous weatherstripping and a tight door sweep at doors next to unconditioned areas such as garages. It also stresses compatible materials and proper air-sealing details.
If a room over the garage feels cold, compare the symptom with our attic hatch insulation guide and rim joist insulation article. Those projects address different leakage paths. Fix the one you actually have rather than buying insulation for the wrong surface.
Choose the Repair That Matches Your Weather
In a snowy region, a flexible seal must stay usable in cold weather and handle slush at the threshold. In a dusty, dry area, small gaps may be more noticeable because grit collects along the garage floor. The material choice should suit both the door profile and local conditions.
UV exposure, repeated compression, and floor abrasion gradually wear flexible strips. A garage used several times a day may show wear sooner than a seldom-opened detached garage. Inspect the corners when you sweep rather than waiting for a winter draft.
Some owners also install side and top weatherstripping. That can help where gaps are visible, but it must not rub hard enough to hinder travel. Follow the door manufacturer’s compatibility guidance instead of layering foam indiscriminately.
A Better Way to Compare Replacement Costs
One quote may cover only the rubber strip. Another may include a damaged retainer, door alignment, and a safety check. Those are different scopes, so ask what parts and labor are included before deciding which price is fair.
For a sound retainer and a straightforward manufacturer-approved profile, the material may be inexpensive and accessible. A twisted retainer, damaged cable, or uneven closing pattern belongs in a professional quote because the door mechanism is involved.
Ask the technician to show the failed component and explain why it needs replacement. Keep the old part or a photograph for your records. That makes it easier to buy the correct profile next time without guessing.
The Last Check Before the First Cold Night
Close the door, turn off the garage light, and scan the floor line. Look for daylight, curled ends, or a section that no longer meets the slab. A clean continuous contact line is the practical goal, not a rubber strip that looks thick from a distance.
After a windy rain, check for moisture patterns. A little water driven under a door in severe conditions may still occur, but a recurring puddle deserves attention to drainage and threshold height. Keep stored cardboard and electrical items off damp floors.
Make a note of the replacement profile and date. The next time the edge looks tired, you will know what fits. More importantly, you will know whether to replace the seal or call someone to correct the door itself.
Final Thoughts
A good seal does its job quietly. The floor stays cleaner, the cold draft eases, and the door closes without extra strain. That outcome comes from a correctly matched profile and a sound door, not the thickest rubber on the shelf.
If the problem involves cables, brackets, springs, or alignment, the smartest repair is the one you do not attempt yourself. Protect the moving door first; the draft can wait for a safe fix.

Nike Carkarel
Nike Carkarel writes about home decor, interior design, and practical ways to make living spaces more beautiful and comfortable. At Turquoise Moon Homes, Nike shares ideas for decorating rooms, choosing furniture, improving home layouts, and making everyday spaces work better. With an interest in thoughtful design and simple home improvements, Nike helps readers find inspiration for homes that feel welcoming, stylish, and easy to live in.