A lasting drywall nail pops repair starts by securing the loose section of drywall, not simply covering the raised spot with joint compound. A nail or screw head that pushes through paint can leave a small bump or crater. If the panel still moves, the blemish may return after a fresh coat of paint.
These little circles are especially annoying on a smooth wall where daylight catches every imperfection. The repair is usually manageable with basic tools, but the order matters more than the amount of compound you spread.
In this article, we will explain why fasteners pop, how to check the area, when to add a drywall screw, and how to blend the patch so it does not stand out later.
What a Drywall Nail Pop Looks Like
A typical fastener pop is a small round bump, cracked paint circle, or shallow crater over a nail or screw. You may see one near a ceiling line or several along the same stud. The shape often follows the fastener head beneath the finish.
Wood framing can shrink as it dries, and small movements may change the pressure between the fastener and drywall. The Gypsum Association’s repair guidance for fastener pops covers the symptoms, causes, and proper repair approach.
Not every wall bump is a nail pop. A raised seam may point to loose tape, a long crack can follow joint movement, and a soft or stained area can suggest moisture. Identify the shape before choosing a patch.
If the wall feels damp, has a spreading stain, or shows widespread cracking, address that condition first. Fresh compound can hide the mark for a short time without solving the reason it appeared.
Why Filling the Hole Alone Often Fails
Joint compound is a finishing material, not a replacement for the fastener holding the drywall to the framing. If the panel can flex, the original nail may push through the new finish again as the wall moves.
Imagine pressing a loose lid flat and painting over it. The surface looks smooth until the lid shifts. Drywall behaves in a similar way when a fastener no longer holds the board snugly against the stud.
That is why a proper drywall nail pops repair often includes a new drywall screw placed in sound framing near the old fastener. The new screw helps hold the panel while the old raised head is dealt with.
Before adding a screw, know where the stud is and check for possible electrical or plumbing runs. Do not drill blindly into a wall near outlets, pipes, or unknown services. If the framing location is uncertain, stop and get qualified help.
Gather a Small, Sensible Repair Kit
For a simple dry-wall surface repair, useful supplies include a putty knife, lightweight joint compound or appropriate patching compound, a sanding sponge, primer, matching paint, a clean cloth, and a drop cloth to protect the floor.
If the board needs securing, you may also need the right drywall screws and a driver with depth control. A screw should hold the board without tearing through the paper face. Overdriving damages the surface and weakens the hold.
Use eye protection and control dust when sanding. Keep children and pets away from the work area. For homes with older painted surfaces, check lead-safe requirements before disturbing paint, especially if the house predates 1978.
Do not buy a large bucket of compound for one small blemish unless you have other repairs planned. A modest amount is enough for thin coats, and leftover material can dry out if it is not stored as directed.
Step One: Check Whether the Drywall Is Still Secure
Press gently around the bump with your fingertips. The panel should feel firm, not springy or loose. If several fasteners along a line are raised, note their spacing and whether the drywall seems to move between them.
Look for a visible screw head, a lifted paint chip, or a small circle of cracked compound. Use a putty knife to remove only loose material around the blemish. Avoid digging a wide crater into sound drywall.
Check the surrounding wall for moisture or a pattern of new cracks. A single dry pop in a stable wall is different from a ceiling with sagging panels or a wall that moves when pushed. Large or structural concerns need professional attention.
Take a quick photo before starting. It helps you compare the repaired area later and remember the exact spot once the first coat dries to a similar color as the wall.
Step Two: Secure the Panel Without Tearing the Paper
If the original fastener has loosened, add a properly sized drywall screw into the stud near the pop, following the panel and fastener guidance for the assembly. The screw head should sit slightly below the surface without cutting through the paper.
Drive slowly and stop as soon as the head forms a shallow dimple. If the paper tears or the screw spins without gripping, that fastener is not doing its job. Move to a sound location in the framing rather than forcing it deeper.
The original popped fastener may need to be reset or removed as appropriate. Do not leave a sharp head sticking out beneath the patch. Keep the surrounding paper intact so the compound has a sound surface to cover.
The USG Sheetrock installation and finishing guide describes repairing popped nails by adding a nearby fastener, resetting the old one, and then finishing with compound. The key is to restore secure attachment before hiding the mark.
Step Three: Patch With Thin Coats, Not One Thick Blob
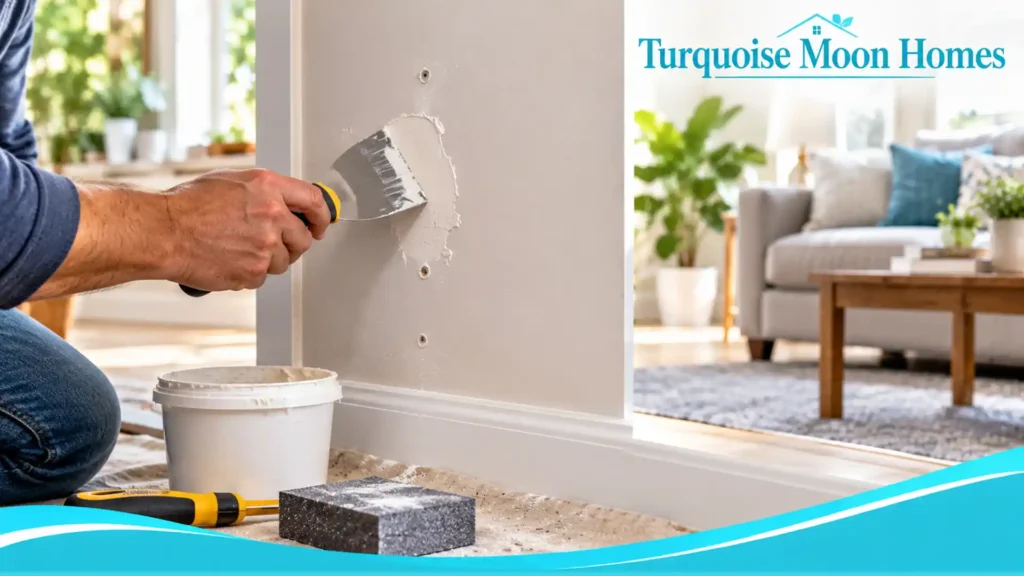
Spread a thin coat of compound over the fastener dimples and feather the edge onto the surrounding wall. A wide, gentle taper is less noticeable than a thick mound directly over the hole.
Let the first coat dry according to the product directions. Drying time depends on the compound, temperature, humidity, and thickness. Rushing the next coat can leave a soft center that shrinks or shows through paint.
Apply a second thin coat if needed, extending it slightly beyond the first. For a very smooth wall, use a broad knife and light pressure so the repair blends into the plane of the drywall.
Do not keep adding material just because you can still see a color difference while the patch is wet. Color is not the same as surface height. Let it dry, then use side lighting to check whether the area is truly flat.
Step Four: Sand, Prime, and Paint Carefully
Once the compound is fully dry, sand lightly with a fine sanding sponge. The goal is to remove ridges, not to expose the fastener again. Run a clean hand over the surface and check it with a lamp held to one side.
Wipe away sanding dust before priming. Unprimed joint compound can absorb paint differently from the surrounding wall and leave a dull patch even when the surface is smooth.
Apply a suitable primer to the repaired area and let it dry. Then use matching paint and the right roller or brush texture. A patch may still show if the surrounding paint has faded or if the original finish has a different sheen.
For a wall in strong side light, painting the whole wall plane may give a more even appearance than touching up a tiny circle. That is a finish decision, not a sign the fastener repair failed.
Ceiling Nail Pops Need Extra Judgment
A small ceiling fastener pop can be similar to one on a wall, but overhead work adds difficulty. Dust falls toward your face, ladders create fall risk, and a loose ceiling panel may need more than a cosmetic repair.
Do not stand on furniture to reach a ceiling. Use a stable work platform suited to the task and follow its safety instructions. If the ceiling sags, cracks widely, or feels soft, arrange a professional inspection before patching.
Ceilings may also hide plumbing leaks, roof leaks, or condensation problems. A stained fastener line is not always ordinary framing movement. Check the source of any moisture before adding screws or compound.
If the ceiling has a textured finish, matching the texture may be harder than fixing the fastener. Test the repair finish in a small area and allow enough time for the texture and paint to dry.
When Repeat Pops Point to a Bigger Issue
One isolated pop may be a straightforward repair. Repeated pops in the same area, widespread cracking, or a wall that visibly shifts deserve a closer look at fastening, framing, and moisture conditions.
Keep a record of where the blemishes return. If the same patch opens again soon after proper securing, do not keep burying it under more compound. The drywall may be moving for a reason that needs attention.
New homes can show some finish movement as materials adjust, but that does not mean every crack should be dismissed. Ask the builder or a qualified drywall professional to assess unusual patterns, especially while a workmanship warranty may apply.
For older homes, also consider past repairs. A patch over loose tape or damaged board may resemble a nail pop. Identifying the underlying material is more useful than repeating the last cosmetic fix.
Final Thoughts: Make the Surface Solid Before It Looks Smooth
A neat drywall nail pops repair is a two-part job: secure the panel, then finish the surface. Thin coats, careful sanding, primer, and matching paint help the fix disappear into the wall.
When the wall is dry and firm, the work can be simple. When it is damp, sagging, or repeatedly cracking, investigate the cause rather than letting fresh paint hide a warning sign.
Frequently Asked Questions
Can I Just Hammer a Nail Pop Back In?
Resetting the old fastener alone may not solve a loose panel. A nearby properly installed drywall screw is often used to restore secure attachment before the surface is patched.
Why Does a Nail Pop Come Back After Painting?
The drywall may still move around a loose fastener, or the patch may not have been fully dry. Secure the board and allow the finishing coats to cure before painting.
Do I Need Primer over a Small Drywall Patch?
Yes, primer helps the porous compound absorb paint more evenly and reduces the chance of a dull or shiny touch-up spot.
Are Several Nail Pops a Structural Problem?
Not always. Drying wood and fastening issues can cause them, but widespread movement, moisture, sagging, or major cracks call for a professional assessment.
You may also read: Sticking Interior Door: Fix the Rub Before You Sand.

Nike Carkarel
Nike Carkarel writes about home decor, interior design, and practical ways to make living spaces more beautiful and comfortable. At Turquoise Moon Homes, Nike shares ideas for decorating rooms, choosing furniture, improving home layouts, and making everyday spaces work better. With an interest in thoughtful design and simple home improvements, Nike helps readers find inspiration for homes that feel welcoming, stylish, and easy to live in.