A kitchen faucet that twists when you turn the handle is annoying in a very particular way. You reach for water with one hand and find yourself steadying the whole fixture with the other. The good news is that a loose kitchen faucet base often points to a mounting problem beneath the sink rather than a failed faucet that needs immediate replacement.
There are exceptions. A cracked countertop, damaged mounting hardware, leaking supply line, or loose handle calls for a different response. The first step is to find out exactly which part moves. Once you know that, you can decide whether a careful tightening job is reasonable or whether the repair belongs with a plumber.
Identify What Is Loose Before Picking Up a Wrench
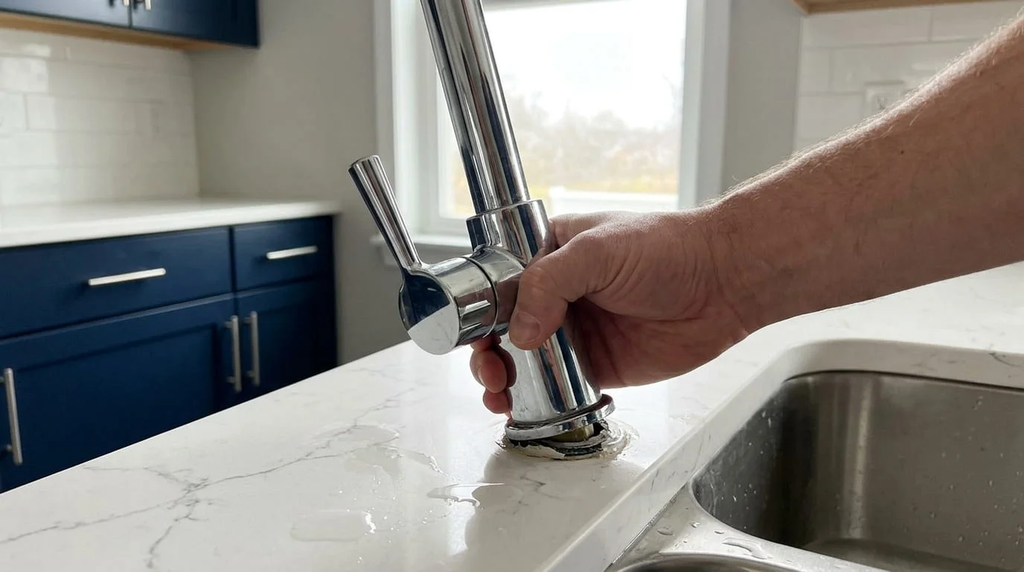
Place one hand on the faucet’s body near the countertop and gently move the spout with the other. Does the entire fixture shift against the sink or counter? Does only the handle wobble? Or does the pull-down spout feel loose while the base stays fixed?
Those symptoms point to different components. A moving body often suggests loose mounting hardware beneath the deck. A loose handle may have a small set screw that needs attention. A wobbly spout may involve its own connection or wear parts. Do not tighten random nuts until you have identified the moving piece.
Moen’s faucet support information describes how loose handles can involve set screws and how repairs differ by model. That is a useful reminder to separate a handle issue from the hardware that anchors the whole faucet.
Check for Leaks Before You Work Beneath the Sink
Clear out cleaning supplies and place a towel or shallow tray in the cabinet. Use a flashlight to look around the faucet’s mounting point, supply hoses, shutoff valves, and the underside of the countertop. If you find active dripping, corrosion, swollen cabinet material, or a damp electrical outlet nearby, address those hazards first.
For work that may disturb supply connections, close the hot and cold shutoff valves and open the faucet briefly to relieve pressure. If the valves are stuck or do not shut off reliably, do not force them until they break. A plumber can replace unreliable valves before a small faucet job turns into a water-damage emergency.
Photograph the arrangement under the sink before moving anything. In a tight cabinet, a clear picture of hose routing and mounting hardware can save time when you need to reassemble or explain the problem to a professional.
Find the Mounting Nut or Bracket
Most deck-mounted kitchen faucets are held by hardware below the sink or countertop. Depending on the design, you may see a large threaded nut, a metal bracket, screws, or a proprietary mounting system. Some fixtures use a long mounting shank; others have more than one attachment point.
Look directly beneath the faucet body rather than assuming the nearest visible nut is the correct one. Water-supply connections should not be used to pull the faucet into place. If you cannot identify the mounting system, search for the model number on the faucet or in the installation paperwork.
Many manufacturers provide exploded diagrams and installation instructions. These show the order of washers, brackets, and nuts, which matters when a part has slipped or been installed upside down. A missing washer cannot always be fixed by tightening harder.
Use the Right Tool for a Cramped Cabinet
A basin wrench, deep socket, or manufacturer-supplied installation tool can reach mounting hardware behind a sink bowl. The correct choice depends on the nut shape and available clearance. A regular adjustable wrench may work in an open cabinet but can be awkward near a garbage disposal.
Do not use pliers on a plastic nut if the tool crushes or deforms it. Avoid gripping supply hoses for leverage. Hold the faucet upright from above while you snug the mounting hardware from below. This is often easier with a second person, especially when the faucet has a tall pull-down spout.
For an example of how specific the hardware sequence can be, Delta Faucet’s mounting-hardware guidance explains a bracket-and-nut arrangement in which the bracket, brass nut, and screws are tightened in a particular order. Follow the instructions for your actual model, not a generic sequence copied from another faucet.
Tighten Gradually, Then Test the Movement
With the faucet aligned correctly on the sink, tighten the mounting nut or bracket a little at a time according to the manufacturer’s directions. Stop periodically and check the base from above. The goal is firm contact without crushing a gasket, bending a bracket, or cracking the sink material.
Overtightening is a real risk, especially on thin stainless-steel sinks, composite surfaces, and plastic mounting components. A faucet should not rock under normal use, but more force is not always the answer. If the nut bottoms out while the base still moves, look for a missing or incorrect spacer or washer.
After tightening, turn the handle, swivel the spout, and use the sprayer as you normally would. The faucet should remain steady without hoses pulling taut or rubbing against sharp cabinet edges. If movement returns immediately, there may be a damaged mounting part or a problem with the deck itself.
What If the Sink Deck Flexes?
Some thin stainless-steel sinks flex slightly around a tall faucet even when the mounting hardware is tight. The faucet may appear loose because the surrounding metal moves. This is different from a nut that has backed off its threads.
Some manufacturers offer reinforcement plates or stabilizers for compatible installations. The right solution depends on the sink construction, faucet design, and available clearance. Do not improvise with scrap wood that could swell when wet or interfere with plumbing and sink clips.
Watch how the surface moves while someone gently operates the faucet. If the deck itself flexes, tightening the mounting nut harder may make no difference. A suitable support plate may be more useful than another turn of the wrench.
When the Faucet Is Loose Because a Part Is Damaged
A stripped mounting nut, cracked bracket, corroded shank, or missing washer may prevent the base from staying secure. In those cases, a compatible replacement part is usually better than makeshift tape or adhesive. Identify the model and check the manufacturer’s parts list before ordering.
If the countertop around the faucet is swollen or crumbling, repair the underlying material before remounting the fixture. Water-damaged particleboard cannot reliably hold a mounting system just because the nut feels tight today. A loose faucet may be the first visible sign of a larger moisture problem.
Older faucets may also have deteriorated gaskets. If the base rocks and water enters the cabinet when the counter gets wet, inspect the seal and installation method. Avoid smearing caulk around the base as a substitute for mechanical support. Caulk cannot replace missing mounting hardware.
Distinguish a Loose Base from a Loose Handle
Many one-handle faucets have a small hidden set screw beneath a cap or at the rear of the handle. Tightening that screw may solve handle wobble without touching the mounting nut. But the screw size and access point vary, so check the model instructions.
If the handle is difficult to operate, drips, or will not stay in position, the cartridge or related components may be involved. Those symptoms should not be treated as a loose-base repair. Likewise, a leaking spout or sprayer hose requires a different diagnosis.
Our guide to a showerhead that drips when off illustrates why finding the actual valve or connection problem matters more than tightening the most visible part. The same diagnostic habit helps with kitchen fixtures.
When a Plumber Is the Smarter Choice
Call a professional if shutoff valves fail, supply lines are leaking, the mounting hardware is inaccessible, or corrosion has made the fixture difficult to remove. A cracked stone or composite countertop also deserves careful assessment. Repairing the faucet while ignoring damaged support can lead to more costly work.
Electrical equipment under the sink adds another reason to be cautious. Keep water away from outlets and disposal wiring. Do not work around energized, wet electrical components. If a leak has reached electrical equipment, stop and arrange safe repair.
Sometimes replacing the faucet is economical when its mounting hardware is obsolete and several other parts are worn. But a good-quality faucet with a loose nut may need only a modest adjustment. A clear diagnosis keeps you from replacing a fixture that is otherwise working well.
Prevent the Base from Loosening Again
Check that the pull-down hose moves freely and does not snag on stored items or cabinet plumbing. Repeated pulling against an obstruction can put extra strain on the faucet. Keep heavy bottles and cleaning tools away from the hose path and mounting hardware.
Wipe up water around the base, and inspect the cabinet periodically for dampness. If you notice a new wobble, address it before the movement becomes severe. Small changes are easier to fix before they damage a gasket or countertop opening.
For other simple hardware problems, our loose door handle repair guide uses the same principle: locate the actual fastener before replacing the entire assembly.
A loose kitchen faucet base is usually manageable once you know which component moves and how the fixture is secured. Check for water damage, use the correct mounting tool, tighten only as directed, and test the whole faucet afterward. If the deck or hardware is damaged, fixing that cause will last longer than forcing the nut tighter.

Nike Carkarel
Nike Carkarel writes about home decor, interior design, and practical ways to make living spaces more beautiful and comfortable. At Turquoise Moon Homes, Nike shares ideas for decorating rooms, choosing furniture, improving home layouts, and making everyday spaces work better. With an interest in thoughtful design and simple home improvements, Nike helps readers find inspiration for homes that feel welcoming, stylish, and easy to live in.